
This is the first post of The Elementary Series, which is aimed to cover important topics that can be applied broadly at all levels. This post discusses the optimal settings in Starcraft.
Many players, including myself, jump into the game without optimising their settings. This is mainly down to the lack of knowledge and not preference. The recommendations below are considered optimal by most players, and you can use that as the base before you make adjustments to suit your preference.
Hardware
Starcraft II has a rather low hardware requirement, so you don’t have to worry too much about whether your old PC can support it.
If you play on a laptop like I do, I strongly recommend you to use a separate keyboard, mouse and monitor. The monitor should be of 16:9 ratio, and the standard resolution is 1920 x 1080. As you can see from the image below, other ratios limit your field of vision unnecessarily.

Taken from TeamLiquid forum – Unknown original source
I have discussed about keyboard and mouse before. A quick summary,
- If you have a low budget, you should prioritise your investment in getting a decent mouse.
- You don’t need fanciful mouse with extra buttons.
- Make sure the mouse fits your grip type.
- Don’t buy “gaming” keyboard. Just buy basic mechanical keyboard.
The rest is down to preference and budget.
In-game settings
Much of the material is based on JaKaTaK’s old videos, as I think he covers the essential stuff more elegantly than others. I will keep it concise, and will not drill too much into the rationale behind the settings. Anything not listed is default.
Graphics
Display mode: Fullscreen
Resolution: 1920 x 1080
Vertical syn: Disable
Refresh rate: Default
Reduced violence: Enable
Graphics and Textures:
– High for models
– Medium for shaders, shadows and effects
– Low for everything else
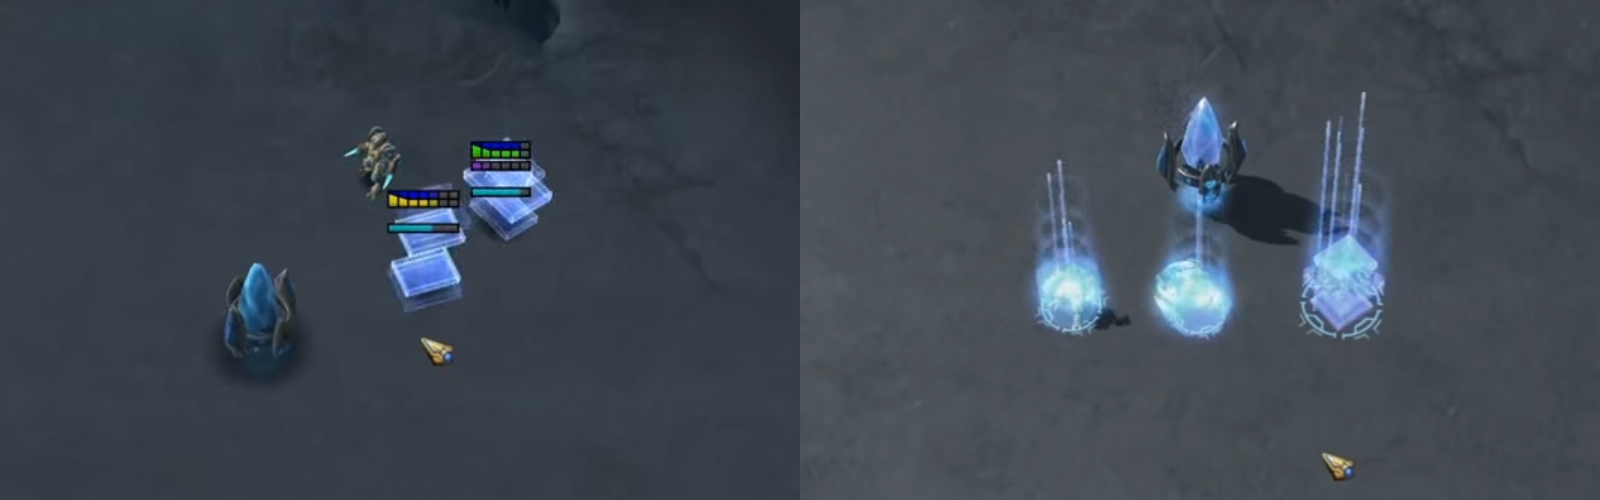
The purpose is to maximise FPS without putting yourself at a disadvantage in game play. For example, if you set everything to low, you cannot tell what unit is being warped in by Protoss. You can tell which of the units is a Sentry in the right image, but you cannot tell in the left image. This setting also helps you to see cloaked units better.
Sound
Music: Disable
Ambient sound: Disable
Move sound: 100%
Sound quality: Low
Voices sound: Enable*
Error sound: Enable*
Others are set to default. Music and ambient sounds do not enhance performance, so just disable them. Voices and error sounds are debatable, because they can provide you with useful information like “upgrade completed”. However, you will also hear other unnecessary sounds. Most importantly, you should use a headphone or earpiece, as it allows you to tell the location of certain events based on sound. It does not have to be “gaming” headphone, you can use anything but your speaker.
Watch the below video for more information.
Control
Set your window mouse setting to the following before you do the in game changes below.
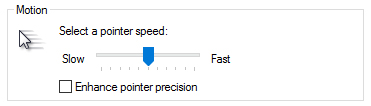
Mouse sensitivity: Enable
Mouse sensitivity: 52%
Mouse wheel zoom: Enable*
Reduce mouse lag: Disable
Windows key: Disable
Mouse scroll: Enable
Invert drag scroll: Disable
Smart camera pan: Disable
Gaming mouse should overwrite the sensitivity in game, so you need to check that. Mouse wheel zoom is basically the roller on your mouse between the left and right click, and you can use that to look for cloak unit like Observer. This can also be done using camera rotation hotkey on keyboard. The reason behind the 52% mouse sensitivity is rather complicated, and you watch the video below for more information.
Gameplay
Alert: Disable
Game timer: Enable
Build grid: Enable
Work status: Enable
Current order indicator: Enable
Select all larva: Disable
Enemy unit selection: Enable
Experience points: Enable*
Show unit life bar: Always or damaged
Control group: Unclickable or hidden
Flyer helper: Always
Experience points can be unnecessary most of the time, but it allows you to see whether the cloak unit is destroyed. For example, opponent burrowed a Widow Mine in your mineral line, and you attack the Supply Depot next to the Widow Mine with your Hellion to kill it. The experience points indicator allows you to know whether it is destroyed.
This video sums up the key settings.
If you enjoyed this article, I’d love you to share it with one friend. You can follow me on Twitter and Facebook. If you really like my work, you can help to sustain the site by contributing via PayPal and Patreon. See you in the next article!

Trying out the settings as they are laid out here. Realized my mouse was tuned super high and net some frames from dialing back options.
Thanks!
Nice, it is going to take some time to get used to the new settings.
Great artcile ! Thanks :) Can’t get rid of the broodwar soundtrack though, the terran’s theme is too good x)
I have a Starcraft playlist on Spotify =)
What do you think about hybrid settings that enable benefits of low settings and low settings? http://www.teamliquid.net/forum/starcraft-2/498454-hybrid-settings-30-lotv-edition#top
Whoops I meant that hybrid enables benefits medium and low settings. I also think it is more aesthetically pleasing which is subjective but If I am gonna play it competitively might as well have something nice to look at.
Yes, aesthetic is definitely important. If your hardware is good enough, you can go for the best looking one. I wish I can do that haha.
Hey another thing to add is that the built-in voice chat can break your headphone audio on Bluetooth if your headphones have a regular sound output channel, a call output channel, and a (mic) call input channel. Even if voice chat is disabled. To get around it I had to disable the microphone device completely so starcraft wouldn’t register it.
Oh, good point. Where do I disable that?